Dream Events

Event Management Dashboard for

Introduction

Welcome to Dream Events, your ultimate event management solution

Product Name:

Dream Events

Overview:

Dream Events is a full-stack event management platform designed to simplify event organizing. The dashboard gives event organizers the tools to manage users, events, bookings, transactions, and analytics, while the mobile app allows attendees to easily explore and book events. Dream Events optimizes the entire event lifecycle from planning to execution.

Key Features:

Admin Dashboard Features:
  • Centralized Dashboard: Access and manage events, users, transactions, and bookings all in one place.
  • Real-Time Analytics: Track performance with live data on event stats, sales, and user activity.
  • Event Management: Create, edit, and organize events easily, including schedules, locations, and details.
  • Bookings & Payments: Monitor and manage bookings, process payments, and review transaction history.
  • Settings & Customization: Tailor platform settings such as branding, event preferences, and parameters to fit your needs.
  • Notification System: Stay updated with notifications for important actions like bookings, transactions, and user activities.
  • Language Options: Easily change the app's language for a localized experience.
Mobile App Features:
  • Discover Upcoming Events: Browse a list of upcoming events to stay ahead of what’s happening.
  • Trending Events: See the most popular events and don’t miss out on the ones everyone is talking about.
  • Easy Event Booking: Book tickets with ease, track your bookings, and receive event notifications.
  • Detailed Event Info: View essential event details like date, time, location, and ticket pricing.
  • Notifications & Reminders: Get timely reminders and updates on event changes or new events.
  • Manage Profile: Update your profile, review past bookings, and track upcoming event registrations.
  • Bookmark Events: Mark events as favorites to revisit or book later.
  • Events on Map: Explore nearby events using the map view for easier navigation.
  • Language Options: Change the app language for a more personalized experience.

Target Audience:

  • Event Organizers: Professionals organizing and managing events of various types.
  • Corporate Planners: Teams managing internal and external corporate events, conferences, and seminars.
  • Entertainment Businesses: Companies handling entertainment events like concerts, festivals, or theater performances.
  • Ticketing Platforms: Businesses involved in the sale and management of event tickets.
  • Small and Large Businesses: Both small-scale event planners and large organizations looking to streamline their event management processes.
  • Individuals & Groups: Anyone organizing personal events such as weddings, parties, and gatherings.

Template Overview

Layout and Structure

Admin Dashboard Frontend Layout Structure

Admin Dashboard Frontend Layout

The Admin Dashboard is designed for a clean, responsive layout that scales with different screen sizes, from large desktop monitors to smaller tablets. The key sections are organized in an intuitive, user-friendly manner for efficient management of events, users, transactions, and more.

Backend Layout Structure

Admin Backend Layout Structure

The backend structure is built to support data management for the entire platform, focusing on efficient storage and retrieval of event-related data, user information, transactions, and booking histories. This ensures smooth data flow between the dashboard and the mobile app.

Mobile App Layout Structure

Mobile App Layout Structure

The mobile app is designed with user convenience in mind, enabling event booking and browsing. The layout is fully optimized for mobile devices, with easy navigation for browsing events, booking tickets, and viewing account information.

Responsive Design

The design of both the Admin Dashboard and Mobile App is fully responsive, ensuring an optimal user experience across different devices and screen sizes. Key features include:

  • Fluid layout that adjusts to different screen resolutions, providing a seamless experience on mobile, tablet, and desktop.
  • Sticky navigation bars for quick access to key sections.
  • Interactive elements, such as event listings and booking options, that are touch-friendly for mobile users.

Navigation Structure

Both the Admin Dashboard and Mobile App have intuitive navigation structures that ensure easy and efficient user flow. The navigation elements include:

  • Sidebar navigation for the Admin Dashboard, providing easy access to sections like event management, user management, transactions, etc.
  • Top navigation for the Mobile App with quick links to event categories, user profile, and notifications.
  • Fast access to frequently used sections, such as booking events and viewing details on the mobile app.

Customizability

The Dream Events app is designed to be highly customizable to suit your specific needs:

  • Customize the **color scheme** and **branding** for both the dashboard and mobile app (e.g., logo, brand colors).
  • Toggle or hide certain sections such as charts, activity logs, or notifications based on your preferences.
  • Easily add new features or modify existing ones with well-commented code.
  • Multiple theme options to choose from, allowing you to adjust the look and feel according to your brand's identity.

Getting Started

Installation Requirements

Before you can install and run the Dream Events dashboard, ensure that your system meets the following requirements:

  • Node.js (v20 or higher)
  • npm (for managing frontend and backend dependencies)
  • Express.js (for the backend framework)
  • MongoDB (as the database)

Installation Guide

Follow the steps below to install and run the Dream Events dashboard for both frontend and backend using the provided zip folders:

Frontend (client) Installation

  1. Download and extract the client zip folder to your local machine.
  2. Navigate into the extracted client folder:
    cd client
  3. Install the required dependencies by running:
    npm install
  4. Create a `.env` file in the root of your client directory with the following settings:
  5. 
    REACT_APP_GOOGLE_API_KEY="
            

Backend (server) Installation (Express.js and MongoDB)

  1. Download and extract the server zip folder to your local machine.
  2. Navigate into the extracted server folder:
    cd server
  3. Install backend dependencies by running:
    npm install
  4. Ensure MongoDB is running locally or use a cloud-based MongoDB connection.
  5. Create a `.env` file in the root of your server directory with the following settings:
  6. 
    JWT_SECRET=""
    JWT_EXPIRE_DATE="1d"
    JWT_REFRESH_EXPIRE_DATE="7d"
    EMAIL_USER=""
    EMAIL_PASS=""
    LOCATIONIQ_API_KEY=""
    AZURE_STORAGE_CONNECTION_STRING=""
    STORAGE_ACCOUNT_NAME=""
    STRIPE_API_KEY=""
    MONGO_URL="mongodb://localhost:27017/dreamevents"
    PORT=5000
            

Running the Application

Frontend (client)

To run the frontend part of the Dream Events dashboard, use the following command:

npm start

This will start the frontend development server at http://localhost:3000.

Backend (server - Express.js)

To run the backend Express server, use the following command:

npm start

The backend server will run on http://localhost:5000 (configured in your `.env` file). Ensure MongoDB is running and the database connection is properly configured.

Accessing the Dashboard

Once both frontend and backend are running, open your browser and go to:

http://localhost:3000

Log in using your credentials to start managing your events, users, bookings, and more with Dream Events!

Mobile Phone Integration

Step-by-Step Guide for Expo Template Integration with Backend

1. Extract the Zip Folder

Extract the provided zip folder that contains the Expo template using a file extraction tool like WinRAR or 7-Zip. The folder will contain all the necessary files to set up your mobile app.

2. Install Node.js and Expo CLI

Ensure Node.js is installed from nodejs.org. Once Node.js is installed, install Expo CLI globally:

npm install -g expo-cli

3. Initialize the Expo Project

Open your terminal, navigate to the extracted folder, and run the following commands to start the project:

cd path_to_extracted_folder
    expo start

After starting, you’ll see a QR code to scan with your mobile device.

4. Run the App on Your Mobile Phone

Download the Expo Go app from the Google Play Store or the Apple App Store. Scan the QR code shown in the terminal to preview the app.

5. Connecting to an Existing Backend

To connect the Expo template with your existing backend (built using Express.js, Node.js, etc.), follow these steps:

5.1. Set Up API Endpoints

Ensure your backend is hosted and accessible via an API. For local development, use tools like ngrok to expose your local server to the internet.

// Example: Exposing your local backend server via ngrok
    ngrok http 3000
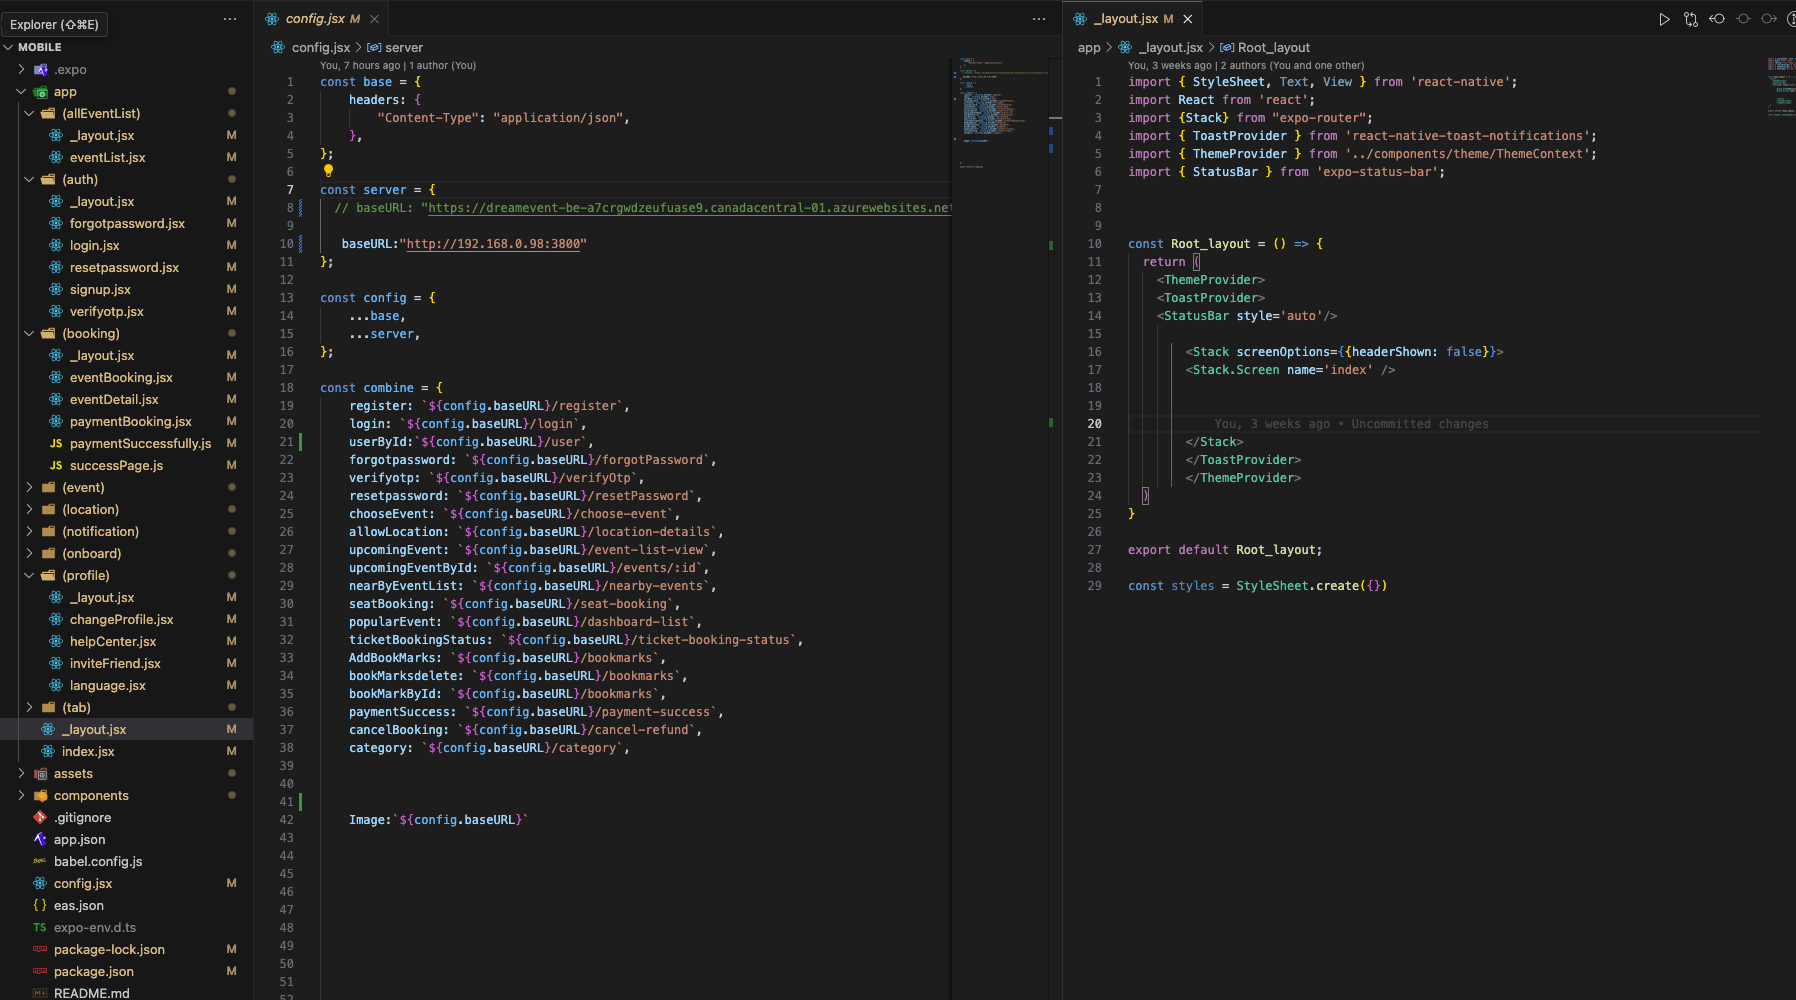
5.2. Configure the API Base URL

In your Expo project, locate the file where API requests are handled (typically in a `services` or `api` folder) and update the base URL to point to your backend. For example, in api.js:

const API_BASE_URL = 'https://your-backend-url.com/api';

If you're using Axios for API calls, configure the base URL as follows:

import axios from 'axios';
    
    const api = axios.create({
      baseURL: 'https://your-backend-url.com/api',
    });
    
    export default api;
5.3. Test the API Connection

Make sure the mobile app can successfully communicate with your backend. You can add a simple test request to ensure everything works:

useEffect(() => {
      api.get('/test-endpoint')
        .then(response => console.log('Backend Response:', response))
        .catch(error => console.error('API Error:', error));
    }, []);

6. Customizing the App

Once the app is running and connected to the backend, you can start customizing it by opening the project folder in a code editor like Visual Studio Code. You can edit files like App.js, located in the root folder, and other components in the components directory.

cd path_to_project
    code .

7. Additional Features

To integrate additional features, such as push notifications, camera, or location services, you can use Expo modules:

  • expo install expo-notifications – For push notifications.
  • expo install expo-camera – For camera functionality.
  • expo install expo-location – For accessing location services.

8. Build and Deploy

Once customization is complete, you can build the app for Android and iOS by running the following commands:

expo build:android
    expo build:ios

For more detailed instructions, visit Expo's official documentation.

UI Components & Modules

1. Dashboard Components

The dashboard components include various interactive UI elements such as charts, tables, and overview panels that help display key metrics for event management.

  • Charts: Display important event statistics (registrations, revenue, attendees) using responsive chart libraries like Chart.js or Recharts.
  • Tables: Display and manage data such as event schedules, bookings, and attendee details using responsive tables.
  • Overview Panels: Use these panels to give quick insights into key data points like active events, bookings, or attendee statistics.

2. Forms and Inputs

Forms are essential for interacting with the Dream Events dashboard and collecting event data. Below are some common forms and inputs:

  • Event Forms: Customize forms for creating, modifying, or canceling events.
  • Booking Forms: Add forms to manage attendee bookings, ticket types, and event reservations.
  • Attendee Forms: Use these for adding or editing attendee details.
  • Form Validation: Utilize form validation libraries like Formik or react-hook-form to ensure proper input validation.

3. Modal and Popup Modules

Modals are useful for displaying additional information or confirming user actions within the event management system.

  • Confirmation Modals: Use these to confirm actions like deleting an event or booking.
  • Information Modals: Display detailed event information or alerts, such as a success message after submitting a booking form.

4. Notifications and Alerts

Notify users of important actions or system messages using notification modules:

  • Toast Notifications: These are small, non-intrusive notifications for actions such as event confirmations or errors.
  • Alert Boxes: Display critical alerts, like system errors, event cancellations, or session timeouts.

5. Customizable Themes and Layouts

The Dream Events template comes with a flexible theme that can be easily customized. You can adjust the theme colors, fonts, and layout settings through SCSS variables.

  • Color Scheme: Modify primary, secondary, and background colors to fit your brand or event theme.
  • Typography: Adjust font-family and font-size properties for different sections to match the event's style.
  • Layout Adjustments: Customize the layout of the sidebar, header, or main content sections according to your dashboard's needs.

6. Data Tables and Pagination

For displaying large sets of event-related data, use responsive data tables with pagination and filtering options.

  • Attendee Data Table: Display and manage attendee data with search and filter capabilities.
  • Event Schedule Table: List events with options to edit, delete, or view details.
  • Pagination: Use pagination to display long lists of data in a more manageable way.

7. Charts and Data Visualization

Data visualization components are key for displaying event insights in a visually appealing way. Here's what you can use:

  • Bar Charts: For showing event registrations, ticket sales, or revenue by event.
  • Pie Charts: To visualize event category distribution, attendee demographics, or ticket types.
  • Line Charts: For tracking trends over time, such as attendee growth or ticket sales performance.

8. Custom Components for Reports and Analytics

Customize and generate various types of reports directly from the dashboard:

  • Event Report: Track event attendance, ticket sales, and overall performance.
  • Revenue Report: Analyze revenue streams from ticket sales, sponsorships, and merchandise.
  • Attendee Reports: Generate reports on attendee demographics, preferences, and engagement history.

API Integration Guide

1. Location API

APIs to handle location-based services for events.

  • Allow Location Details: Enable location access and fetch details.
    POST /location

2. Bookmark API

Endpoints for managing bookmarks.

  • Create Bookmark: Bookmark an event.
    POST /bookmarks
  • Remove Bookmark: Remove a bookmarked event.
    DELETE /bookmarks
  • Get Bookmark: Retrieve bookmarked events.
    GET /bookmarks

3. Event API

APIs for managing events.

  • Create Event: Create a new event.
    POST /upcoming-events
  • Edit Event: Edit an existing event by ID.
    PUT /upcoming-events/:id
  • Get Event by ID: Retrieve event details by ID.
    GET /upcoming-events/:id
  • Delete Event: Delete an event by ID.
    DELETE /upcoming-events/:id
  • Mobile Event List: View the list of events for mobile.
    GET /event-list-view
  • Nearby Events: Get events happening nearby.
    POST /nearby-events

4. Booking API

APIs for seat bookings and transactions.

  • Booking List: Retrieve booking details.
    POST /booking-list
  • Event Status: Get the status of an event.
    POST /event-status
  • Customer List: Get a list of customers for an event.
    POST /customer-list
  • Transaction List: Get transaction history for an event.
    POST /transaction-list
  • Create Seat Booking: Book a seat for an event.
    POST /seat-booking
  • Cancel Booking: Cancel a seat booking and process refund.
    POST /cancel-refund
  • Payment Success: Confirm payment success.
    GET /payment-success
  • Ticket Booking Status: Get the status of a booked ticket.
    POST /ticket-booking-status

5. Category API

APIs for managing event categories.

  • Get Event Categories: Retrieve event categories.
    GET /category
  • Add Category: Add a new event category.
    POST /category

6. Dashboard API

APIs for managing dashboard analytics.

  • Trending Events: Get trending events.
    GET /trending-events
  • Recent Events: View recent events.
    GET /recent-events
  • Latest Sales: View latest sales.
    GET /latest-sales
  • Dashboard Stats: View dashboard statistics.
    GET /stats
  • Total Events: Get total event count.
    POST /total-events
  • Event List: Get a list of events.
    POST /event-list
  • Revenue by Category: Get revenue analytics by category.
    POST /category-revenue
  • Sales Revenue: Retrieve sales and revenue analytics.
    POST /sales-revenue
  • Upcoming Events: View a list of upcoming events.
    POST /upcoming-list
  • Mobile Popular Events: Get popular events for mobile.
    GET /popular-event

7. User Management API

APIs for managing users and roles in the dashboard.

  • Create User: Add a new dashboard user.
    POST /create-user
  • Edit User: Edit user details.
    PUT /create-user/:id
  • Delete User: Delete a user by ID.
    DELETE /create-user/:id
  • Get User: Get user details by ID.
    GET /create-user/:id
  • User List: Retrieve a list of users.
    POST /user-list
  • Dashboard Login: Login to the dashboard.
    POST /dashboard-login
  • Forgot Password: Handle password reset.
    POST /forgot-password
  • Verify OTP: Verify OTP for password reset.
    POST /verify-otp
  • Reset Password: Reset password using OTP.
    POST /reset-password
  • Refresh Token: Refresh the access token.
    POST /refresh-token
  • Logout: Logout user from the system.
    GET /logout

8. Role & Permission API

APIs for managing roles and permissions.

  • Get Roles: Retrieve a list of roles.
    GET /role
  • Create Role: Create a new role.
    POST /role
  • Edit Role: Edit an existing role.
    PUT /role/:id
  • Delete Role: Delete a role by ID.
    DELETE /role/:id
  • Get Role by ID: Retrieve role details by ID.
    GET /role/:id
  • Role Permission List: Retrieve permissions for roles.
    GET /role-permission
  • Edit Role Permission: Modify permissions for a role.
    POST /role-permission
  • Delete Role Permission: Delete permissions for a role.
    DELETE /role-permission/:id
  • Role Permission by ID: Retrieve role permission by ID.
    GET /role-permission/:id

9. Features API

Manage available features based on roles.

  • Get Features: Retrieve available features.
    GET /feature

10. Notification API

APIs to manage notifications.

  • Get Notifications: Retrieve notifications.
    GET /notifications
  • Mark Notification as Read: Mark a notification as read.
    PUT /notifications/:notificationId

User Roles and Permissions

Dream Events Dashboard is designed to be managed by a single Admin. The admin role has complete access to all features and functionalities within the dashboard. This includes:

  • Managing event listings and schedules.
  • Handling attendee and customer data.
  • Managing event services, tickets, and pricing.
  • Accessing financial reports, sales, and event analytics.
  • Setting up and managing payment gateways and integrations.
  • Customizing dashboard settings and event preferences.

Since this dashboard currently supports only one admin, there are no additional user roles or restricted permissions at this time. The admin is responsible for all aspects of managing and maintaining the Dream Events platform.

Customization Guide

1. Customizing the Color Scheme

The color scheme of the Dream Events template can be adjusted to match your event planning business's branding. Here's how to modify it in a React project:

  • Open the stylesheets/styles.scss file.
  • Search for the CSS variables like --primary-color, --secondary-color, and others in the SCSS file.
  • Update these variables with your desired color values. For example, change:
  • :root { --primary-color: #3498db; }
  • Once updated, the changes will be reflected on the frontend immediately after saving the file.

2. Connecting to MongoDB Using Compass

To connect to MongoDB and manage your database using MongoDB Compass, follow these steps:

  • Install MongoDB Compass from the official MongoDB website: MongoDB Compass Download.
  • Once installed, open MongoDB Compass and click on the New Connection button.
  • Enter your MongoDB connection string. This can be obtained from your MongoDB Atlas account or your local MongoDB setup.
  • Click on the Connect button to establish a connection with your MongoDB instance.
  • In the "Database" section of MongoDB Compass, you will see all your collections and documents. You can now manage your data easily using the Compass interface.
  • For more detailed steps, refer to the MongoDB Compass Documentation.

3. Integrating Stripe for Payments

To integrate Stripe for payments in your Dream Events dashboard, follow these steps:

  • Create a Stripe account by visiting Stripe's official website.
  • Once your account is set up, you can obtain your API keys (publishable key and secret key) from the Stripe Dashboard under the API section.
  • In your Dream Events React project, install the Stripe package and Stripe React libraries using npm:
  • npm install @stripe/stripe-js @stripe/react-stripe-js
  • In the backend (assuming you're using Express.js), create an API route to handle payment processing:
  • 
        import Stripe from 'stripe';
        const stripe = new Stripe('your-secret-key'); // Use your Stripe Secret Key here
        
        app.post('/api/payment', async (req, res) => {
          try {
            const paymentIntent = await stripe.paymentIntents.create({
              amount: 5000, // Amount in cents
              currency: 'usd',
              payment_method: req.body.paymentMethodId,
              confirmation_method: 'manual',
              confirm: true,
            });
        
            res.status(200).json({ clientSecret: paymentIntent.client_secret });
          } catch (err) {
            res.status(500).json({ error: err.message });
          }
        });
            
  • On the frontend, use the Stripe React libraries to handle the payment process. Create a PaymentComponent.js and integrate Stripe as follows:
  • 
        import { useEffect, useState } from 'react';
        import { loadStripe } from '@stripe/stripe-js';
        import { Elements, CardElement, useStripe, useElements } from '@stripe/react-stripe-js';
        
        const stripePromise = loadStripe('your-publishable-key');
        
        const PaymentComponent = () => {
          const [clientSecret, setClientSecret] = useState(null);
          const stripe = useStripe();
          const elements = useElements();
        
          useEffect(() => {
            // Create a PaymentIntent when the component mounts
            fetch('/api/payment', { method: 'POST' })
              .then((res) => res.json())
              .then((data) => setClientSecret(data.clientSecret));
          }, []);
        
          const handlePayment = async () => {
            const cardElement = elements.getElement(CardElement);
        
            const { error, paymentIntent } = await stripe.confirmCardPayment(clientSecret, {
              payment_method: {
                card: cardElement,
              },
            });
        
            if (error) {
              console.error(error.message);
            } else {
              console.log('Payment successful!', paymentIntent);
            }
          };
        
          return (
            
    ); }; const StripeWrapper = () => ( ); export default StripeWrapper;
  • For more details on integrating Stripe with your app, refer to the Stripe Documentation.

4. Customizing the Fonts and Typography Using Google Fonts

To change the fonts across your Dream Events dashboard using Google Fonts, follow these steps:

  • Go to the Google Fonts website and search for the font you want to use. For example, search for "Lato" or any other font that fits your theme.
  • Once you've selected your font, you will see a section to get the link. Choose the font weights and styles you want, and copy the link provided. For example, to use "Lato", you would get this link:
  • <link href="https://fonts.googleapis.com/css2?family=lato:wght@400;500;700&display=swap" rel="stylesheet">
  • Now, open your React project and go to the public/index.html file. Paste the Google Fonts link you copied earlier inside the <head> tag:
  • Next, go to your src/index.css or src/App.css file and set the font-family for the body to the new font:
  • body { font-family: 'lato', inter; }
  • Once you save these changes, your Dream Events dashboard will now use the new Google Font across all pages.
  • For more information and to explore more fonts, refer to the Google Fonts documentation.

5. Editing the Dashboard Homepage Layout in main.js

To customize the homepage layout and structure, you'll need to edit the main.js file inside the src/layout/ folder. Follow these steps:

  • Open the src/layout/main.js file in your project directory.
  • Inside this file, you will find the structure for the container, header, sidebar, and the content sections of the homepage.
  • Make changes as required, such as rearranging components or modifying the layout.
  • Once you’ve made the changes, save the file. The new layout will be reflected on the homepage.

6. Integrating LocationIQ for Geolocation

To integrate LocationIQ for geolocation services in your project, follow these steps:

  • Go to LocationIQ and create an account.
  • Once logged in, go to your dashboard and get your API Key for accessing LocationIQ services.
  • In your React project, install the axios package to make API requests:
  • npm install axios
  • Next, create a geolocation function in your app. For example, create a new file in the utils folder called getLocation.js:
  • 
        import axios from 'axios';
        
        const getLocation = async (address) => {
          const res = await axios.get(`https://us1.locationiq.com/v1/search.php?key=your-api-key&q=${address}&format=json`);
          return res.data;
        };
        
        export default getLocation;
            
  • To use this function, import and call it from your components where you need geolocation functionality:
  • 
        import getLocation from '../utils/getLocation';
        
        const LocationComponent = () => {
          const [location, setLocation] = useState(null);
        
          useEffect(() => {
            const fetchLocation = async () => {
              const loc = await getLocation('New York');
              setLocation(loc);
            };
        
            fetchLocation();
          }, []);
        
          return 
    {location ?
    {JSON.stringify(location, null, 2)}
    : 'Loading location data...'}
    ; };
  • For more details on using LocationIQ, refer to the LocationIQ API Documentation.

Deployment Guide

To deploy Dream Events for use in a live environment, you can use various hosting platforms. Below are the steps for deploying the application and some guidance on bandwidth requirements and hosting plans.

Steps to Deploy Dream Events

  1. Ensure your project is set up correctly for production with necessary environment variables defined in the .env file.
  2. Build your React frontend by running the following command:
    npm run build
  3. Deploy your backend (Express.js) to a hosting platform such as Heroku or any other cloud provider.
  4. Deploy the frontend (React) on platforms like Vercel, Netlify, or AWS S3 for static file hosting.

Hosting Provider Recommendations

For web hosting, you can choose a provider based on your expected traffic and bandwidth requirements. Below is an overview of what to consider:

1. Small Scale Usage (Up to 5,000 Monthly Visitors)

2. Medium Scale Usage (5,000 - 50,000 Monthly Visitors)

3. Large Scale Usage (50,000+ Monthly Visitors)

Heroku Example

Here's an example of how you can deploy the Dream Events backend using Heroku:

  1. Sign up at Heroku and create a new project.
  2. Install the Heroku CLI and log in:
    heroku login
  3. Initialize a new Git repository (if you haven't already):
    git init
  4. Push your code to Heroku:
    
        heroku git:remote -a your-app-name
        git add .
        git commit -m "Deploying Dream Events"
        git push heroku master
                  
  5. Set up environment variables (API keys, database credentials) in the Heroku dashboard under the "Settings" tab.
  6. Open your deployed application by running:
    heroku open

Other Hosting Providers

If you prefer to use other hosting platforms, here are some alternatives:

  • Amazon Web Services (AWS) - Use EC2 for the backend and S3 for static asset hosting.
  • Google Cloud - Deploy using Google App Engine for scalable infrastructure.
  • DigitalOcean - Affordable cloud hosting starting at $5/month for small to medium-scale applications.

Azure Example

If you want to deploy Dream Events on **Microsoft Azure**, follow the steps below:

  1. Ensure your backend and frontend are ready for production and environment variables are set in your .env file.
  2. Deploying the Frontend (React) on Azure Static Web Apps

    1. Go to the Azure portal and create a new **Static Web App**.
    2. Link your GitHub repository or use **Local Git** for deployment.
    3. After connecting your GitHub repository, Azure will automatically build and deploy your frontend on every commit.
    4. Set up custom domains or SSL certificates if required under the **Custom Domains** section in the Azure portal.

    Deploying the Backend (Express.js) on Azure App Service

    1. Create a new **App Service** in Azure for your backend.
    2. Ensure your backend code is in a Git repository.
    3. Set up the backend in Azure by choosing **Node.js** as the runtime stack.
    4. Push your code to Azure using Git:
      
          az webapp deployment source config-local-git --name  --resource-group 
          git push azure master
                      
    5. Configure environment variables in the Azure portal under **Configuration**.
  3. Test the deployed application by visiting the provided URL for your backend and frontend.

Troubleshooting and FAQ

Dream Events is a comprehensive event management application built using React. It provides a range of features to help you manage events, including event scheduling, attendee management, ticketing, vendor coordination, and more. It's designed to streamline event planning and management efficiently.

Dream Events is available for purchase on ThemeForest. You can securely buy and download the application for immediate use.

All sales of Dream Events are final. We do not offer refunds or exchanges once the product has been purchased. If you encounter any technical issues or have questions, please contact our support team, and we will assist you to the best of our abilities.

There are two types of licenses available for Dream Events:
  • Regular License: This license allows you or one client to use Dream Events in a single end product where access is free and no subscription fees are charged. You can’t sell the end product, except to one client. If you or your client want to sell the end product or charge for its use, you will need the Extended License. For more details, visit: Regular License Details.
  • Extended License: This license allows you or one client to create an end product that users can be charged for (such as subscription-based access or selling the application). It covers one single end product and allows for the end product to be sold. For more details, visit: Extended License Details.

If you're experiencing any issues with Dream Events, please reach out to our support team via email at codeforge0@gmail.com. Our team is available from Monday to Friday, 9:00 AM to 6:00 PM IST, and will respond to your query within 12 to 24 hours.

Yes, Dream Events is highly customizable. You can modify the dashboard’s UI and extend its features according to your event planning needs. Detailed documentation is provided to guide you through the setup and customization process.

After purchasing Dream Events from ThemeForest, you will receive a download link for the zip folder. Follow the installation guide in the documentation to set up both the frontend (React) and backend (Node.js with MongoDB) environments.

Support and Updates

Contact Us

For more information or technical support, please don’t hesitate to contact us via codeforge0@gmail.com. Our dedicated team is here to help you every step of the way in deploying your application.

Support Availability

We are available to assist you from Monday to Friday, 9:00 AM to 6:00 PM IST. You can expect a response to your queries within 12 to 24 hours during our working days.

Note: We observe weekends off, so Saturday and Sunday are non-working days. We appreciate your understanding and look forward to assisting you promptly during business hours.

Appendix

Glossary

  • React: A JavaScript library for building user interfaces, especially for single-page applications, by creating reusable components.
  • Node.js: A JavaScript runtime built on Chrome's V8 JavaScript engine, used for building scalable and server-side applications.
  • MongoDB: A NoSQL database that stores data in JSON-like documents, offering flexibility and scalability for modern applications.
  • npm: Node Package Manager, a package manager for JavaScript, used to manage dependencies and libraries in Node.js and React projects.
  • Stripe: A payment processing platform that enables businesses to accept payments online, supporting various payment methods globally.
  • Middleware: A function in Node.js that processes incoming requests before they reach the main logic of the application, often used for handling authentication, logging, or errors.
  • Controller: In the backend, the controller handles the logic for managing requests, interacting with the database, and sending responses to the client.
  • Model: Represents the data schema of the application, which interacts with the database to handle data storage and retrieval (e.g., MongoDB).
  • Environment Variables (.env): A file where sensitive configuration details such as API keys and database credentials are stored securely.
  • License: A legal agreement granting the buyer specific rights to use, modify, and distribute the software under defined terms.

Release History

  • v1.0: Initial release of Dream Events. Features include event management, attendee tracking, ticketing, and vendor management.
Thank you for purchasing the Dream Events management application. We sincerely appreciate your support and hope that this tool enhances your event planning experience. Should you have any questions or require assistance, feel free to reach out. Your success is our priority!